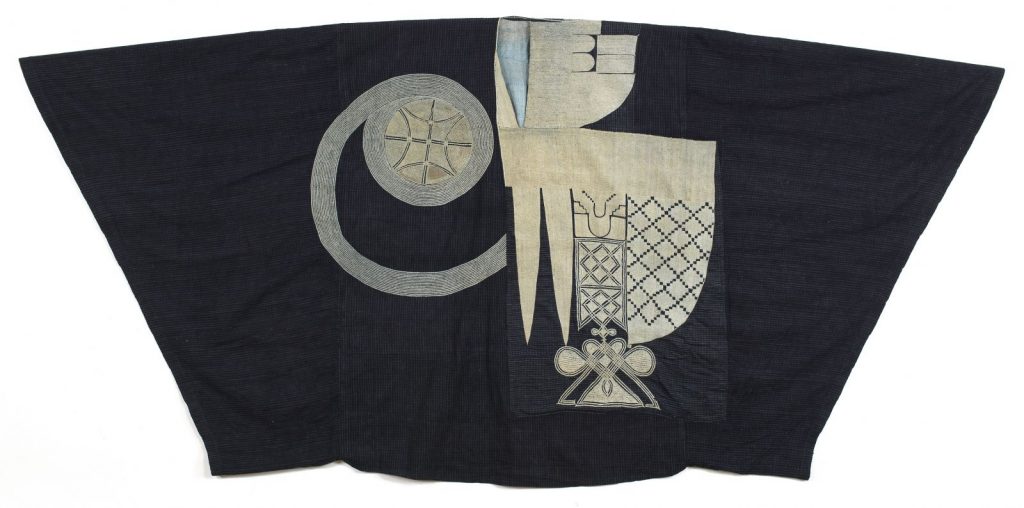
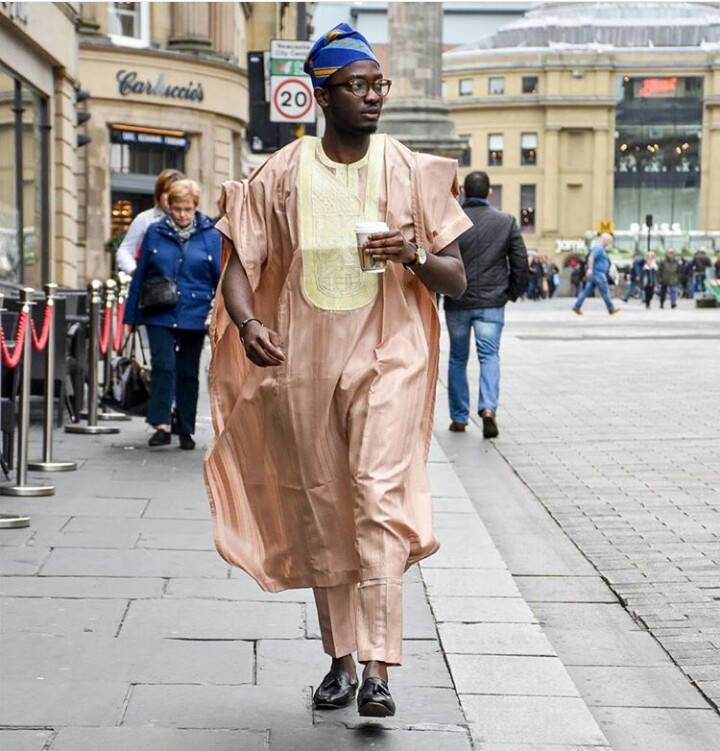
A long time ago Agbada clothing was reserved for the kings and other members of the nobility, but today Agbada can be seen on millions of Nigerian men and women. Normally Agbada is worn on special occasions like weddings and other official receptions.
The overall look of the outfit depends on both the cut and the use of fabrics for Agbada. Find out how to cut and sew Agbada to make your own one-of-a-kind native garment!
Find your ideal Agbada on Jiji
1. Materials for Agbada
Before you begin cutting and sewing your future Agbada, you have to get your materials ready. Here is what you need to make your own Agbada.
- Fabric of your choice
- Pattern paper
- Fabric marker or pencil
- Tracing wheel
- Measuring tape
- Your measurements
Let’s look closer at some of the items you need for sewing. You’re probably wondering how many yards to sew Agbada you really need. The amount of fabric depends on your height and size, but the average yardage is between 4 and 7 yards of fabric.
Another essential component of sewing is the measurement for Agbada. You’ll need four measurements, taken with a measuring tape:
- From the neck to the hand
- Around the chest
- From the neck to the elbow joint
- From the shoulder to the knee (depending on the desired length.
2. How to cut Agbada
Now that you have your tools and measurements ready, here comes the most important part of creating an Agbada – the cutting. The pattern paper for the cutting should be as big as possible: you can use newspapers or wallpaper instead of professional pattern paper. Follow these steps and learn how to cut Agbada pattern.
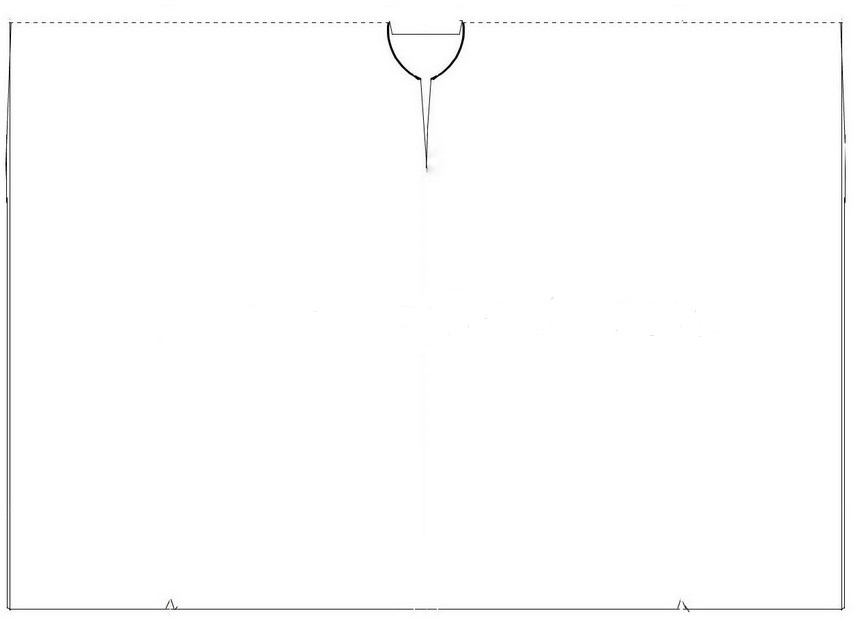
- Fold your pattern paper in half at the longer side.
- Cut the paper so that its length is your shoulder-to-knees measurement, and the width is neck-to-hand long.
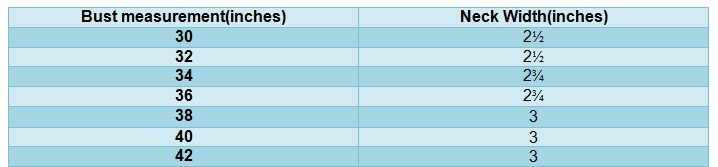
- Use this table to determine your neck width. Mark the obtained measurement on the shorter side of the pattern.
- Measure 3 inches from the corner of the pattern on the longer side and draw an arch between the two points.
- At this point, you can add a keyhole to the neckline. Measure the length from the neck to the chest (it’s usually around 8 inches) and draw a line on the pattern. Then draw a slant line from the chest line to the neckline.
- Turn the pattern around and draw the back neckline. Measure 1 inch from the corner of the pattern and make an L-shaped cut to the point of neck width.
- Unfold your pattern and finish cutting the Agbada along the lines.
- Now you need to adjust the bottom of the Agbada. Mark your neck-to-elbow measurements on the two sides of the pattern and make little nips at each mark.
- Open up your pattern. This is what it should look like at the end.
3. How to sew Agbada
You’ll be surprised to know that sewing is actually the easiest part of making your own Agbada outfit! Trace the pattern onto your fabric using a fabric marker or pencil and cut the fabric along the lines. Fold the edges of the fabric and secure them with an overlocking machine or manually.
Then go back to the cuts you made in step 8 of the cutting tutorial and make 5-inch stitches upwards to give the Agbada its shape. Now you can decorate the neckline of the Agbada with an embroidery sewing machine, by embroidering a pattern manually or outsourcing the embroidery to the professionals. Now your Agbada is finally ready to be worn!
Find your new affordable sewing machine on Jiji