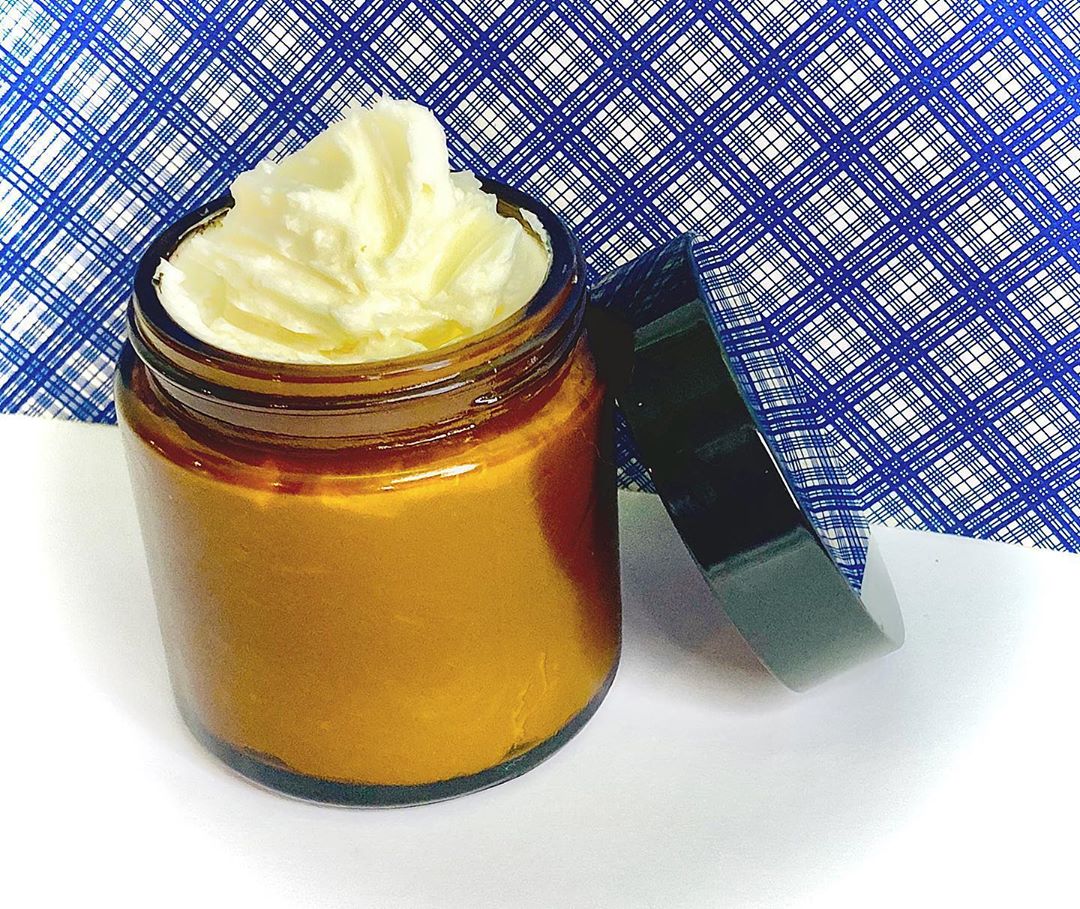
Shea butter is one of the most popular beauty ingredients, and for a good reason: it has a variety of benefits and suits nearly every skin type and condition. And while you can get the desired effect from applying shea butter directly to your skin, you can increase its efficiency with a homemade shea butter face cream. Here is how to do it!
Shop high-quality shea butter from trusted Nigerian sellers on Jiji
1. What you’ll need
Shea butter is a powerful moisturizer, which is why today we are going to be making a moisturizing face cream where shea butter is the leading ingredient. Shea butter is so potent that it can work wonders even in the simplest recipe, but to make your cream more beneficial to your skin and more pleasant to use, you will need a few more key ingredients. Here is what you’ll need to make your first jar of shea butter face cream:
Read more: Shea Butter Benefits For Your Face, Body And Hair
- Shea butter – 1/3 cup
- Carrier oil – 1/3 cup
- Aloe gel – 1/2 cup
- Beeswax – 1/8 cup
- Rose water – 1/3 cup
- Essential oil – 15 drops
Now let’s talk about the ingredients for your cream. You can use any carrier oil you want, but jojoba and almond oils are both very popular and easily accessible. Beeswax is used to give the cream a better consistency, but if you cannot find it, you can make the cream without beeswax – it will be slightly more liquid. Aloe gel is used for moisturizing and you can either use store-bought or extract your own from a plant.
Read more: Aloe Vera For Skin Whitening: Effects And Uses
Rose water is added to give the cream a skin-smoothing effect and increase the skin’s elasticity. Finally, the choice of essential oil to add to the cream depends on your tastes and the desired effect. Rose oil will make your skin even smoother, tea tree oil will help clear your skin, and chamomile oil will calm down your irritated skin.
You will also need several tools for your cream making process: a double boiler, an immersion blender, a tall measuring cup, a spatula, and sterilized glass jars. Depending on the size of your jars, you will get between 1 and 4 jars of shea butter cream, so you can gift some of them to your friends or use the cream for other parts of your body.
2. How to make shea butter face cream
When you have the required ingredients at hand, it’s time to begin mixing! Here is a step-by-step guide on how to make shea butter face cream:
Read more: How To Make Body Cream
- Using a double boiler, melt the shea butter and beeswax, stirring constantly and not allowing the mixture to overheat. Once the ingredients are melted, allow them to cool down.
- In the meantime, mix your carrier oil, aloe gel, and rose water in a tall measuring cup. Use the double boiler to slightly heat up the mixture and make it reach the temperature of the shea butter mixture.
- Pour the carrier oil mixture back into the measuring cup and use an immersion blender to thoroughly mix the ingredients together. The mixture will become opaque.
- Without turning off the blender, start pouring the shea butter mixture in a slow stream. Continue mixing with the blender and you will see the mixture getting light and fluffy within a couple of minutes.
- Add the essential oil and mix well to incorporate it into the cream.
- Pour the cream into sterilized jars, close the lids, and store in the fridge for up to 1 year or out of the fridge for up to 6 months. Use twice a day after cleansing and toning or whenever you feel the need to moisturize your skin.
Buy and sell with confidence from your phone using the Jiji app