Accessories are a very important part of one’s image, it does not only compliment the clothes you’re wearing but also it can underline some of your features while hiding others.
Different bead designs in Nigeria are very popular, as this jewelry is very traditional and at the same time it doesn’t feel old. Abuja connection bead is one of those Nigerian beads styles, they are very elaborate, so, naturally, they are pretty expensive. If you don’t want to pay a fortune, but still want to impress people, here is an Abuja connection bead tutorial that will help you to make them in the comfort of your house.
Find accessories that will suit your style with the Jiji app!
Abuja connection bead style can be used to make multiple accessories, from necklaces to earrings. There are two distinctive variations of the Abuja connection bead design – old and new Abuja connection bead. Let’s take a look at Abuja connection bead making for both of them.
1. Old Abuja connection bead tutorial
Here are the materials you’re going to need to make the jewelry in this style:
- 3 mm monofilament (its length will depend on the piece of jewelry you’re making)
- 2 types of beads of your choice, one is smaller and one is bigger (for this tutorial – 6 mm rotelle crystals and 11/o seed beads)
- Clasps
And these are the steps Abuja connection bead making consists of:
1) Cut a thread and tie each end to needles
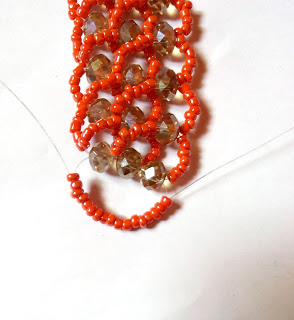
2) Put 3 bigger beads in the middle of the thread, then put one more of them through one needle and pull the second needle through it. You will get a cross-shaped form.
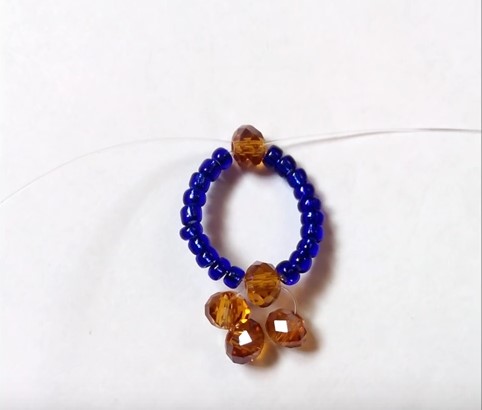
3) Put 10 smaller beads on each side of this cross
4) Take 1 bigger bead and again pull both needles through it
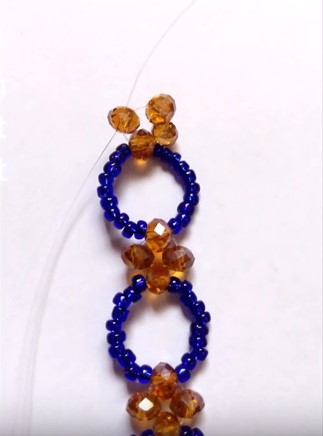
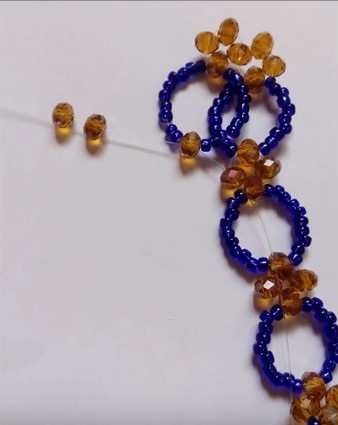
5) Put one bigger bead on each side, then again pull both needles through one more bigger bead. This will be your main element of the jewelry. Repeat previous steps until you get the length you need for your piece of jewelry.
6) Now it’s time to add more levels. Put 2 bigger beads on the right side and one on the left
7) Pull the right needle through the left single bead. To begin the second layer, put two bigger beads on the right side and one on the left side. Pull the right needle through the left bead. This will make a turn and allow you to begin the second layer. For the first element of the new layer use 6 smaller beads on the left side and 7 smaller beads on the right.
8) After each central bigger bead, pull a needle through the central bigger bead of the previous level. You will need one bigger bead less since the bead from the previous level will be a part of the cross
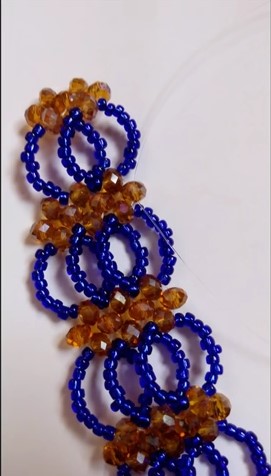
9) You can add the third level to the second or just add it to a new thread
10) In the end, put 8 smaller beads on one side, then pull the second needle through them in the opposite direction. Pass both needles through the top two bigger beads. Make some knots and cut the thread, apply the clasps. Your beaded jewelry is ready!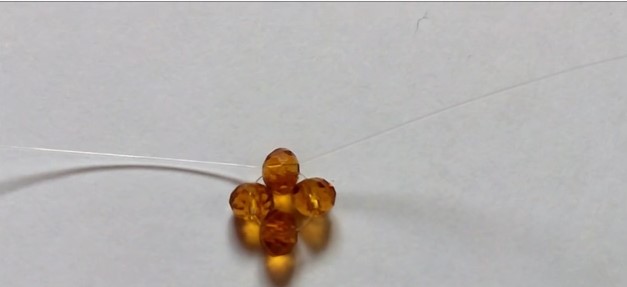
2. New Abuja connection bead tutorial
Steps on how to make Abuja connection bead are generally similar for both old and new style. The only difference lies within the main element of the chain. The materials you need are the same. Here is how to make Abuja connection a bead in new style:
1) Put one bigger bead in the middle of the thread, then put 5 smaller beads on each side of it.
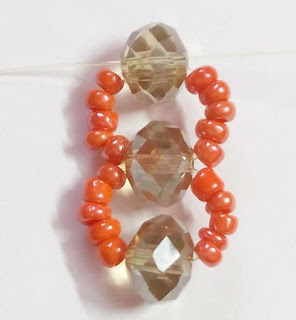
2) But one more bigger bead, then pull the needle from the opposite side through it. That’s basically it – this is the main element for the new Abuja connection bead, repeat the same steps as for the previous tutorial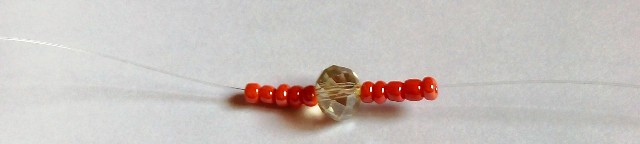
Buy jewelry for the best price with the Jiji app!